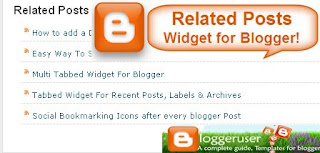
 Blogger widget “related posts” in blogger or blogspot blog is one of the blogger tools that help to add related articles to each of your blog posts. Related posts are selected according to your category, label or tag that you add to categorize your blog post. Related posts widget helps to increase your page visits by making users to discover other similar user interested topic posts from your blog, thus making your blog more user friendly. This Related posts hack is really useful tool for your blog that can help you to make your blog professional and at the same time can keep users for a long span of time on your blog. Below is a step by step manual instruction or blogger hack on adding “related posts widget” to your blog.
Follow the below steps properly and in order to have the similar widget you see in the pic above.
Widget Adding Instructions:
1. Go to Blogger Dashboard - click Edit Layout - then click Edit HTML
Wait: Before Editing your Template, Save a copy of your current template by clicking 'Download Full Template' in 'Edit HTML' page of the Blogger 'Layout' Window and 'Preview' the changes before Saving.
2. Check the ‘expand Widgets Template Box” as shown in the figure below.

3.Then Search (Ctrl+F) the code given below in your template:
</head>
4. Copy and Add the code given below just before the above line:
<style>
#related-posts {
float : left;
width : 540px;
margin-top:20px;
margin-left : 5px;
margin-bottom:20px;
font : 11px Verdana;
margin-bottom:10px;
}
#related-posts .widget {
list-style-type : none;
margin : 5px 0 5px 0;
padding : 0;
}
#related-posts .widget h2, #related-posts h2 {
color : #940f04;
font-size : 20px;
font-weight : normal;
margin : 5px 7px 0;
padding : 0 0 5px;
}
#related-posts a {
color : #054474;
font-size : 11px;
text-decoration : none;
}
#related-posts a:hover {
color : #054474;
text-decoration : none;
}
#related-posts ul {
border : medium none;
margin : 10px;
padding : 0;
}
#related-posts ul li {
display : block;
background : url("http://i299.photobucket.com/albums/mm297/zozuglogger/weed-bullet.gif") no-repeat 0 0;
margin : 0;
padding-top : 0;
padding-right : 0;
padding-bottom : 1px;
padding-left : 16px;
margin-bottom : 5px;
line-height : 2em;
border-bottom:1px dotted #cccccc;
}
</style>
<script src='http://bloggeruserutilities.googlepages.com/Related_posts_hack.js' type='text/javascript'/>
5. Again Search(Ctrl+F) the code given below (or similar) in your template:
<p><data:post.body/><p>
6. Add the code given below just after the above line
<b:if cond='data:blog.pageType == "item"'>
<div id="related-posts">
<font face='Arial' size='3'><b>Related Posts : </b></font><font color='#FFFFFF'><b:loop values='data:post.labels' var='label'><data:label.name/><b:if cond='data:label.isLast != "true"'>,</b:if><b:if cond='data:blog.pageType == "item"'>
<script expr:src='"/feeds/posts/default/-/" + data:label.name + "?alt=json-in-script&callback=related_results_labels&max-results=5"' type='text/javascript'/></b:if></b:loop> </font>
<script type='text/javascript'> removeRelatedDuplicates(); printRelatedLabels();
</script>
</div></b:if>
7. Save your Template. That’s it.
Widget Customization
max-results=5
Widget Use and Summary
This widget is not only important widget for making your blog look professional but also an important widget to help your blog users to quickly navigate on another important and related post.
Help and Comment
 If you have any problems or any queries related to this widget, Please leave a comment below and I would be glad to help you !
Meanwhile, you can also visit "Related posts by category Blogger widget" for a similar widget.
Also I want to know your view about this widget. So Comment !
0 comments:
Post a Comment